
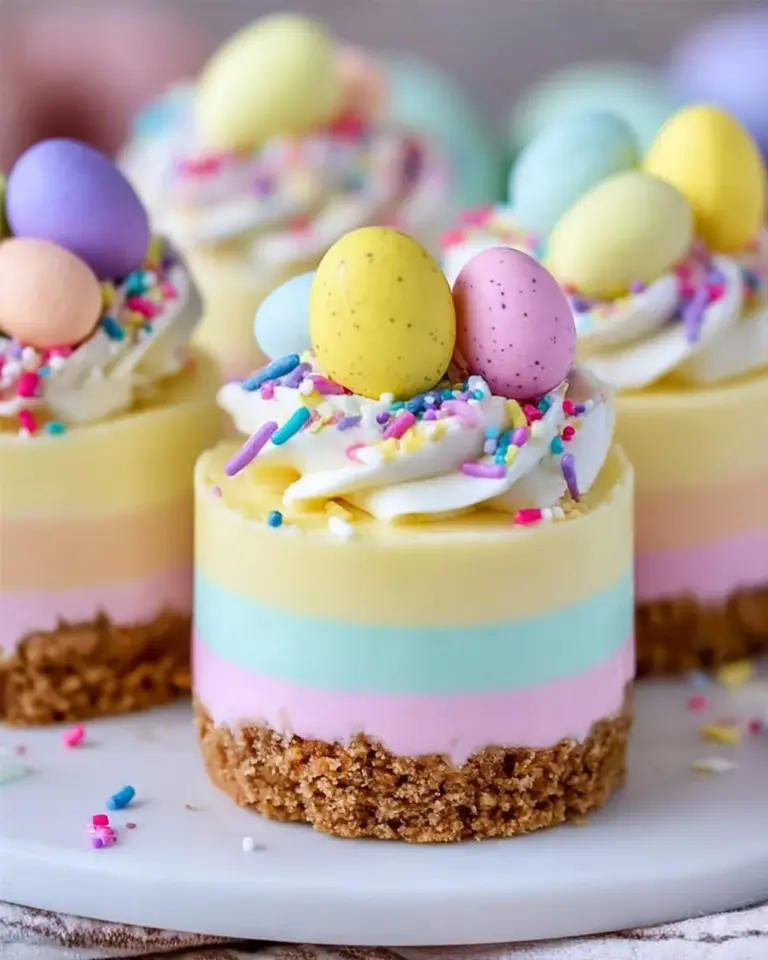
As spring gently unfolds, bringing with it whispers of fresh blooms and the promise of warmer days, the vibrant colors and joyous spirit of Easter begin to emerge. What better way to celebrate this delightful season than with a dessert that captures the essence of springtime? Enter the enchanting Easter No-Bake Mini Cheesecakes, a sweet treat that delights both the eyes and the palate. Picture this: smooth, creamy layers of cheesecake, their pastel colors reminiscent of the soft hues of spring flowers, nestled in buttery graham cracker crusts. Each bite melts in your mouth, offering a perfect balance of sweetness, tanginess, and a hint of nostalgia, transporting you to sunny days and joyful celebrations.
The excitement of these mini cheesecakes isn’t merely in their taste; it’s in their presentation. With swirls of pastel colors and eye-catching Easter-themed toppings, they stand as a centerpiece on any holiday table, beckoning both young and old to indulge. As you prepare to dig into one of these delectable bites, the subtle crunch of the crust gives way to a creamy cloud of cheesecake filling that dances on your tongue. The fun doesn’t stop there—these delightful bites offer endless opportunities for personalization, making each cheesecake uniquely your own.
Why You’ll Love This Easter No-Bake Mini Cheesecakes
Easter No-Bake Mini Cheesecakes bring happiness in every bite, creating moments that linger long after the last crumb is gone. Not only do they showcase visually stunning pastel colors that scream spring, but they also deliver a velvety texture that feels luxurious on the palate. The no-bake aspect means you spend less time in the kitchen and more time enjoying the festivities, perfect for busy families and anyone who prefers a more relaxed holiday approach.
Imagine serving these mini cheesecakes at your Easter brunch, family gathering, or as a sweet surprise for loved ones. Their playful, approachable nature makes them a hit with kids and adults alike, and the customizable decorations allow everyone to get creative. Best of all? They are utterly irresistible—no one can resist that sweet creaminess and the nostalgic crunch of graham cracker crust.
Preparation Phase & Tools to Use
Before diving into the delightful world of cheesecake creation, having the right tools can make the process smooth and enjoyable. Here’s a quick rundown of the essentials:
-
Mixing Bowls: Invest in a few quality mixing bowls. A large one for your cream cheese mixture and smaller ones for the colored layers work best. Make sure they are deep enough to avoid splatters!
-
Electric Mixer: A stand mixer or handheld electric mixer saves time and energy when whipping cream and blending the cheesecake ingredients to a silky perfection.
-
Spatula & Whisk: A rubber spatula helps you fold the whipped cream gently into the cheesecake mixture without deflating it. A whisk brings air and volume into whipped cream, achieving those gorgeous stiff peaks.
-
Mini Graham Cracker Cups: These delightful crust vessels are the heart of your mini cheesecakes, making serving and snacking easy and mess-free.
-
Food Coloring: Pastel colors create that festive look essential for your Easter celebration.
-
Refrigerator: Chilling is crucial! Ensure your refrigerator is ready to set these beauties until it’s time to serve.
Ingredients for Easter No-Bake Mini Cheesecakes
To create this spectacular seasonal treat, gather the following ingredients which embody simplicity and flavor:
- 8 oz cream cheese, softened: This is the star of your cheesecake, providing that luxurious creamy texture. Make sure it’s at room temperature for easy mixing.
- 1/2 cup powdered sugar: Sweetness is vital to balance the tanginess of the cream cheese. Feel free to substitute with a sugar alternative if necessary.
- 1 teaspoon vanilla extract: A dash of this fragrant extract adds warmth and enhances the flavor profile beautifully.
- 1 cup whipping cream: This light, airy cream creates that satisfying texture. Opt for heavy cream if you desire a super-rich finish.
- Food coloring (pastel colors): Captivating shades like soft pinks, blues, yellows, and greens make your mini cheesecakes pop and perfectly fit the holiday theme.
- Graham cracker crust (mini cups): The perfect crunchy contrasts that ties the dessert together. If you can’t find mini cups, you can easily create your own using full-size graham crackers.
- Easter-themed toppings (e.g., chocolate eggs, sprinkles): Unleash your creativity with garnishes that not only enhance flavor but also add a festive spirit.
How to Make Easter No-Bake Mini Cheesecakes
Creating these mini masterpieces is a delightful process filled with anticipation. Follow these simple steps for a perfect Easter treat:
-
Combine Ingredients: In a mixing bowl, beat the softened cream cheese with the powdered sugar and vanilla extract until smooth. This forms the creamy base of your cheesecake.
-
Whip the Cream: In a separate bowl, whip the cream until stiff peaks form. This adds lightness and aeration to balance the dense cream cheese.
-
Fold Together: Carefully fold the whipped cream into the cream cheese mixture using a spatula until fully combined. This step is key; you want to maintain the airiness of the whipped cream.
-
Color the Mixture: Divide the cheesecake mixture into small bowls and enjoy the creative process of tinting each with a different pastel food coloring. Swirl until you achieve the desired intensity.
-
Layer in Crusts: Spoon the colored mixtures into your mini graham cracker crusts, layering them carefully for a visually appealing striped effect.
-
Chill: Place your mini cheesecakes in the refrigerator for at least 2 hours. This allows them to set perfectly, making them easier to serve.
-
Decorate & Serve: Just before serving, get festive! Decorate your mini cheesecakes with Easter-themed toppings—think chocolate eggs, cute little bunnies made of frosting, and colorful sprinkles.
Chef’s Notes & Helpful Tips
-
Make-Ahead Tips: You can prepare these delightful cheesecakes the day before your gathering, allowing them to chill overnight. They hold well in the fridge and can free up time on the day of your celebration.
-
Cooking Alternatives: While this recipe is designed for chilling, you can also bake a traditional cheesecake recipe and then cut it into mini portions. Just be mindful of cooling times before slicing!
-
Customization Ideas: Change up the flavors! Imagine a dark chocolate cheesecake or an orange zest-infused filling for a citrus twist. Berry coulis or fruit toppings also work beautifully.
Common Mistakes to Avoid
-
Overwhipping the Cream: This can lead to a grainy texture. Stop whipping as soon as you see stiff peaks.
-
Skipping the Chill Time: Letting these beauties chill for a minimum of 2 hours is critical for achieving the perfect texture. Patience pays off!
-
Not Using Room Temperature Cream Cheese: Cold cream cheese is harder to blend smoothly, which can leave lumps in your filling.
What to Serve With Easter No-Bake Mini Cheesecakes
These mini cheesecakes shine on their own, but for those looking to create an epic dessert spread, consider pairing them with:
- Fresh Fruits: Berries, sliced kiwi, or even tangy citrus slices provide a refreshing contrast.
- Coffee or Tea: A warm beverage perfectly balances the richness of the cheesecakes, enhancing the overall experience.
- Chocolate Fondue: Dip fresh fruits alongside the cheesecakes for an indulgent treat.
- Easter Brownies: Chewy, chocolatey goodness pairs beautifully with the slight tartness of the cheesecake.
- Whipped Cream: A dollop of freshly whipped cream elevates each bite.
- Cookie Platter: Include various textures with a selection of cookies to bring diverse flavors to the table.
- Milkshakes: Creamy milkshakes can complement this dessert, offering a nostalgic combo.
Storage & Reheating Instructions
Easter No-Bake Mini Cheesecakes store beautifully! Keep them in an airtight container in the fridge for up to 5 days. For longer storage, freeze them for up to a month. Just remember to let them thaw in the refrigerator overnight before serving again. Enjoying them cold adds to their charm!
Estimated Nutrition Information
This recipe yields approximately 12 mini cheesecakes, each containing around:
- Calories: 180
- Fat: 12g
- Carbohydrates: 18g
- Sugar: 10g
- Protein: 2g
Nutrition values are estimated and can vary based on ingredient brands and specific measurements.
FAQs
Can I use low-fat cream cheese?
Absolutely! Low-fat cream cheese will still provide a creamy texture, but expect a slightly different taste and texture.
How long do these mini cheesecakes need to chill?
A minimum of 2 hours is essential for the right texture, but chilling overnight will yield even better results.
What if I don’t have graham cracker cups?
No problem! Simply crush graham crackers and mix them with melted butter to form a crust in mini muffin tins.
Can I make these gluten-free?
Yes! Substitute gluten-free graham crackers for the crust, and all other ingredients are naturally gluten-free.
Can I add fruit puree to the mixture?
Definitely! Swirling in a fruit puree can add flavor and a pop of color to your cheesecakes. Just remember to adjust the sugar if your fruit is sweet.
Conclusion
Indulging in Easter No-Bake Mini Cheesecakes means stepping into a world of joy and flavor, celebrating not just the holiday but the beauty of spring. With their vibrant colors, creamy textures, and sweet decorations, these cheesecakes serve as a loving reminder to cherish the moments spent with loved ones. Whether this becomes a cherished family tradition or a special treat shared with friends, don’t let the season pass without making these delightful bites. Gather your ingredients, roll up your sleeves, and get ready to create memories that taste just as sweet as these irresistible mini cheesecakes. Happy baking and happy Easter!
PrintEaster No-Bake Mini Cheesecakes
Delightfully creamy and colorful mini cheesecakes perfect for Easter celebrations, featuring a buttery graham cracker crust and customizable decorations.
- Prep Time: 15 minutes
- Cook Time: 120 minutes
- Total Time: 135 minutes
- Yield: 12 servings 1x
- Category: Dessert
- Method: No-Bake
- Cuisine: American
- Diet: Vegetarian
Ingredients
- 8 oz cream cheese, softened
- 1/2 cup powdered sugar
- 1 teaspoon vanilla extract
- 1 cup whipping cream
- Food coloring (pastel colors)
- Graham cracker crust (mini cups)
- Easter-themed toppings (e.g., chocolate eggs, sprinkles)
Instructions
- Combine Ingredients: In a mixing bowl, beat the softened cream cheese with the powdered sugar and vanilla extract until smooth.
- Whip the Cream: In a separate bowl, whip the cream until stiff peaks form.
- Fold Together: Carefully fold the whipped cream into the cream cheese mixture using a spatula until fully combined.
- Color the Mixture: Divide the cheesecake mixture into small bowls and tint each with a different pastel food coloring.
- Layer in Crusts: Spoon the colored mixtures into your mini graham cracker crusts, layering them carefully.
- Chill: Place your mini cheesecakes in the refrigerator for at least 120 minutes.
- Decorate & Serve: Just before serving, decorate your mini cheesecakes with Easter-themed toppings.
Notes
Make these mini cheesecakes a day ahead for best results, allowing them to chill overnight.
Nutrition
- Serving Size: 1 cheesecake
- Calories: 180
- Sugar: 10g
- Sodium: 150mg
- Fat: 12g
- Saturated Fat: 7g
- Unsaturated Fat: 4g
- Trans Fat: 0g
- Carbohydrates: 18g
- Fiber: 0g
- Protein: 2g
- Cholesterol: 40mg